
Before You Begin
Before restoring your website, it’s important to keep a few things in mind:
- Restoring a backup will replace your current files with an older version.
- If you’re unsure which backup to restore, contact us for guidance.
- You will need access to your DirectAdmin control panel. If you don’t have your login details, check for the welcome email we sent you when you first setup your account with Tresseo.
Step 1: Log In to DirectAdmin
- Open your web browser.
- Go to your DirectAdmin login page. This is usually something like:
https://yourwebsite.com:2222 - Enter your username and password, then click Login.
Step 2: Open JetBackup
- Look for the JetBackup icon in the main menu or under Advanced Features in the left side menu.
- Click on JetBackup to open it.
Tip: If you can’t find JetBackup, try using the search bar at the top of the DirectAdmin dashboard and type “JetBackup.”

Step 3: Choose What You Want to Restore
JetBackup lets you restore different parts of your website. When it opens, you’ll see several options along the left-hand side or across the top.
Common options include:
- Home Directory – Restores all of your website’s files
- Databases – Restores your website’s database (where content like blog posts or product listings are stored)
- Emails – Restores your email accounts and messages
For most website restores, you’ll want to start with Home Directory and Databases.
Click on the option that matches what you need to restore.
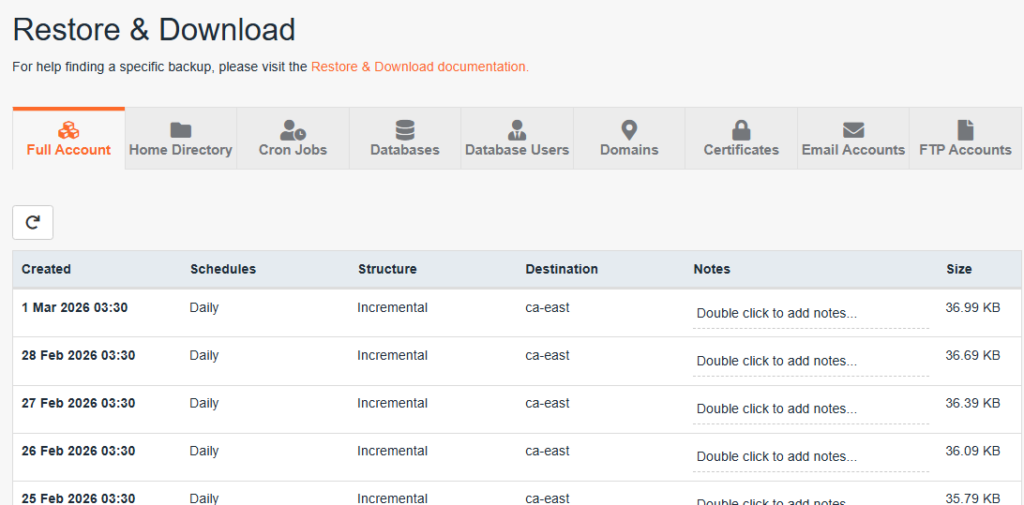
Step 4: Find a Backup to Restore
- After choosing a category (e.g., Home Directory), you’ll see a list of available backups. Each one will show a date and time so you can identify when it was created.
- Find the backup from before the problem occurred. For example, if a mistake on your website was made on March 15th, choose a backup from March 14th or earlier.
- Click on that backup to select it.
Tip: If you’re not sure which date to choose, pick the most recent backup that you know was working correctly.

Step 5: Start the Restore
- Once you’ve selected a backup, you’ll see the “Restore” button at the bottom.
- Click Restore.
Important: This step will overwrite your current files with the backup version. Double-check that you’ve selected the right backup before confirming.
Step 6: Wait for the Restore to Complete
- JetBackup will begin restoring your backup. This usually takes anywhere from a few seconds to a few minutes, depending on the size of your website.
- You may see a progress bar or a status message. Wait until it says “Complete” or “Success” before doing anything else.
- Do not close the browser tab while the restore is in progress.
Step 7: Check Your Website
- Once the restore is complete, open a new browser tab.
- Type in your website address (e.g.,
https://yourwebsite.ca) and press Enter. - Check that your website is loading correctly and that the issue has been resolved.
If your website looks the way it should, the restore was successful!
Something Still Not Right?
If your website still isn’t working after the restore, here are a few things to try:
- Clear your browser cache. Sometimes your browser shows an old version of a page. Try pressing
Ctrl + Shift + R(Windows) orCmd + Shift + R(Mac) to do a hard refresh. - Try a different backup date. Go back into JetBackup and try restoring from an earlier backup.
- Contact us and we’ll help you.
Frequently Asked Questions
Where are the backups stored?
The backups are stored on independent servers in Montreal, Canada.
Will restoring a backup delete my recent content?
Yes. Restoring a backup replaces your current files with the older backup version. Any changes made after the backup date will be lost.
How often are backups created?
Backups are created every night, with 31 days of copies kept on hand.
Can I restore just one file instead of everything?
Yes. In JetBackup, select the backup you need and use the file browser to locate and restore individual files or folders rather than restoring everything at once.
If you need further assistance, please contact us.


