
Setting your domain name server info is an important step in website management. Understanding how to use name servers will help keep your website working smoothly and ensure visitors can reach your site.
Understanding Name Servers and Why They Matter
What Is a Name Server?
A name server is like an address book for the internet. When someone types your domain name into their browser, the name server tells their computer where your website is hosted. Think of it as sending someone to your house by giving them your street address. Without the correct name server info, visitors cannot find your website online.
Why Change Your Domain’s Name Servers?
Changing your domain’s name server info connects your domain name to your new web host, such as Tresseo. This makes sure visitors see your website content instead of an error page. If your name server settings are not correct, your site may become unreachable or show content from another server.
Key Terms Explained
- Domain: Your website’s address, like example.com.
- Name server: Where the internet checks to find your website files.
- Web hosting: The service that stores your website files and makes them viewable online; similar to renting space for your business.
Next, let’s look at how you can update your name server info for your Tresseo-hosted website.
How to Set Name Servers for Tresseo Hosting
Choosing the Right Tresseo Name Server Info
Tresseo offers different name servers depending on where your website is hosted. You will need to update your domain settings to match your Tresseo server location. Here are the options:
CA Server (Canada):
- ns1.tresseohost.com
- ns2.tresseohost.com
EU Server (Europe):
- ns1.eu.tresseo.com
- ns2.eu.tresseo.com
Choose the set that fits your hosting plan location. At Tresseo, we recommend checking your hosting welcome email or dashboard if you’re unsure which to pick.
Step-by-Step Instructions to Update Name Servers
Find Your Domain Registrar
Your domain registrar is where you bought your domain name. Common examples include GoDaddy, Namecheap, or Google Domains.
Log In to Your Domain Management Portal
Use your username and password to access your account where your domain is registered.
Locate the Name Server Settings
Once logged in, look for options like “DNS Management,” “Name Servers,” or “Domain Settings.” Each registrar uses slightly different names for these menus. If you cannot find it, most registrars offer a help section with step-by-step guidance.
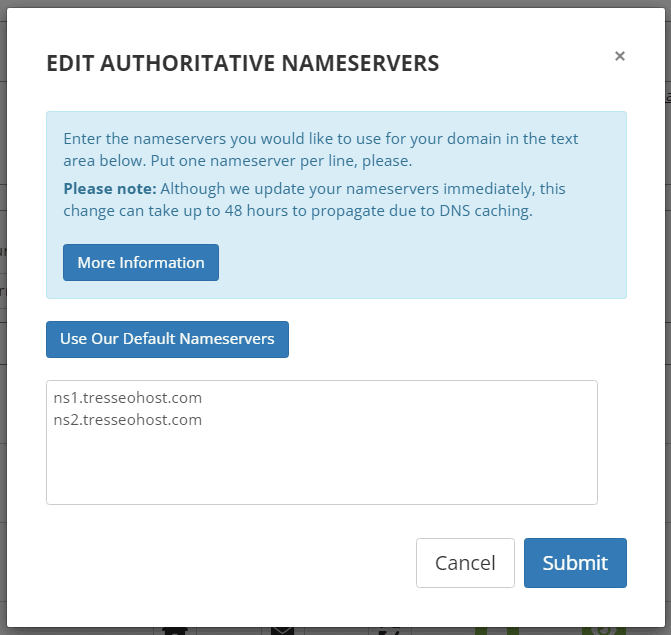
Enter Tresseo’s Name Server Info
Delete any old name server entries in the list.
Enter the two new Tresseo name server addresses that match your hosting location (EU or CA). You must use both provided name servers. This helps with redundancy and prevents outages if one goes down.
For example, if your website is hosted on Tresseo’s Canadian servers:
Save and Confirm Changes
After entering the new name server info, confirm or save your changes. Many registrars ask you to click “Save,” “Apply,” or “Update.” Watch for a confirmation message.
Wait for Changes to Take Effect
It can take up to 24-48 hours for name server changes to be seen everywhere on the internet. This period is called DNS propagation. You do not need to do anything during this time, but your website may appear off or display an older version until the change is finished.
Tips for Smooth Updates and Troubleshooting
If your site is not displaying correctly after twenty-four hours, double-check that you entered the name servers with no spelling mistakes. For faster updates, clear your web browser’s cache or use a different device to check. If you need help, contact your domain registrar or Tresseo support for quick advice.
When managing websites with systems like WordPress, you do not need to adjust settings inside the content manager when switching name servers; all changes happen at the domain level.
Setting your correct Tresseo name server info ensures your website runs safely and visitors land on the right page. By following these steps, you will keep your site online and easy to reach for everyone.


