
Easy email setup is a breeze with Direct Admin, making digital communication effortless for everyone. Direct Admin, a web hosting control panel, simplifies the process for both beginners and experts.

Whether you’re setting up email for the first time or managing multiple accounts, Direct Admin’s straightforward interface will guide you seamlessly. In this blog post, we’ll walk you through the steps to set up your email in Direct Admin.
First, log in to your Direct Admin control panel. You will need your username and password, usually provided by your web hosting service. Once logged in, you’ll be greeted by a user-friendly dashboard. This is where you’ll initiate the easy email setup process.
Also see: DirectAdmin Email Essentials: Set Up, Manage, and Protect (YouTube)
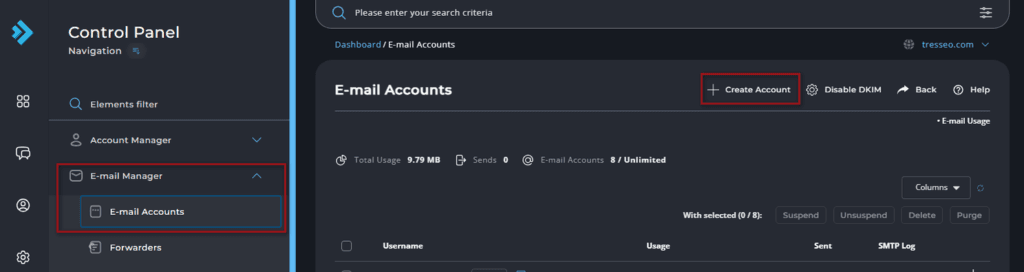
From the dashboard, locate the “Email Manager” section. Click on it to reveal a suite of email management options. This section is central for managing all aspects of your email accounts. Here, you can create new email accounts, manage existing ones, and configure settings.
To begin creating a new email account, select “Email Accounts.”
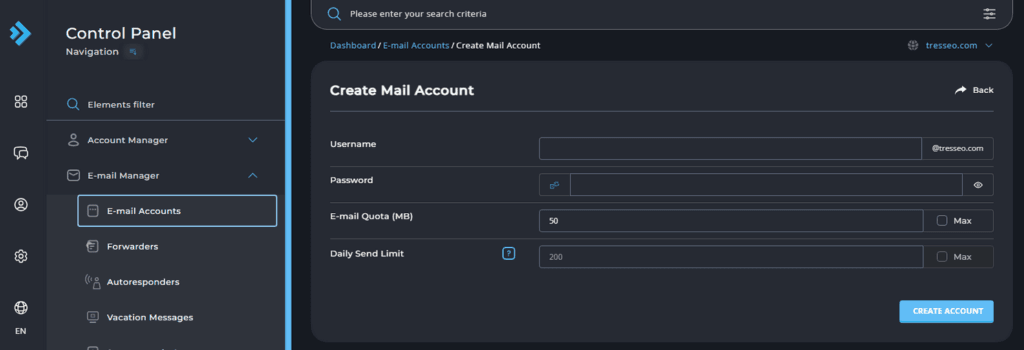
On this page, click the “Create Mail Account” button. You’ll then need to input essential information such as your desired email address and password. Ensure you choose a strong password to secure your account.
Next, you can allocate storage space for your new email account. This helps manage your server’s resources efficiently. Once all fields are filled, click “Create” to finalize your easy email setup.
With your new email created, the next step is configuring your email client (like Outlook or Thunderbird). Direct Admin provides all necessary settings for this configuration. Typically, these include your incoming and outgoing server details, which are essential for sending and receiving emails.
Find these details in the “Instructions” section under your newly created email account in Direct Admin. Copy these details accurately into your email client settings. This will enable seamless synchronization of your email with your chosen client.
After completing the configurations, it’s crucial to test your setup. Send a test email to and from your new email address. This ensures everything is functioning correctly. If you encounter any issues, re-check your configurations against the instructions provided in Direct Admin.

Direct Admin offers advanced settings for more customized email management. Under “Spam Filters,” you can configure anti-spam measures to reduce junk mail. Adjust spam threshold levels to suit your preferences.
Additionally, under “Autoresponders,” you can set up automatic replies. This is particularly useful for vacation notifications or during periods of unavailability. With these settings, you can maintain professionalism and manage correspondence efficiently.
Direct Admin also allows email forwarding and creating aliases. Email forwarding enables you to redirect emails from one account to another. It’s a handy feature for consolidating correspondence.
To set up forwarding, go to “Forwarders” in the Email Manager and follow the prompts. Similarly, email aliases can be set under the “Aliases” section. This allows you to manage multiple email addresses under a primary account.


Copyright © 2022 - 2026. Tresseo. All rights reserved.